Seeing the “Not Secure” label on your WordPress site can be alarming—not only for you as a site owner, but also for your visitors. This warning typically appears in the address bar of browsers when your website does not have a properly configured SSL certificate. It signals that data transmitted between the user and your site may not be encrypted, making it vulnerable to interception.
If left unresolved, this issue can negatively impact user trust, SEO rankings, conversion rates, and overall credibility. But the good news? It’s completely fixable—and you don’t need to be a tech expert to do it.
In this in-depth guide, you’ll learn why this warning appears, how to remove it permanently, and how to keep your WordPress site secure moving forward.
What Does the “Not Secure” Warning Mean?
When your browser displays the “Not Secure” warning, it means that your site is loading over HTTP (Hypertext Transfer Protocol) instead of HTTPS (Hypertext Transfer Protocol Secure). Unlike HTTP, HTTPS uses an SSL/TLS certificate to encrypt communication between the server and your visitors.
Without HTTPS:
- Any data your users submit (passwords, credit card info, contact forms) is transmitted in plaintext.
- Your website becomes a target for man-in-the-middle attacks.
- Browsers like Chrome, Firefox, and Safari mark your site as untrustworthy.
With HTTPS:
- All communication is encrypted.
- Your site gets a green padlock or “Secure” label.
- You meet the security requirements of search engines and major browsers.

Why Your WordPress Site Might Show “Not Secure”
Here are the most common reasons:
- You don’t have an SSL certificate installed.
- Your SSL certificate has expired.
- Your SSL certificate is improperly configured.
- You have mixed content (some resources are still loading via HTTP).
Let’s now go step-by-step on how to diagnose and solve these issues.
Step 1: Back Up Your WordPress Site
Before making any major changes, create a full backup of your website. This includes your files, databases, themes, plugins, and media uploads. If anything breaks during SSL setup, you can quickly revert.
Use plugins like:
- UpdraftPlus
- BlogVault
- All-in-One WP Migration
Make sure your backup is stored in a secure cloud location like Dropbox or Google Drive.
Step 2: Check If SSL Is Installed on Your Hosting
Visit your WordPress site using https:// in the browser address bar. If the browser refuses to load or gives a certificate error, chances are you don’t have a valid SSL certificate installed.
You can confirm this using free tools like:
If your domain shows an expired, invalid, or absent SSL certificate, move to the next step.
Step 3: Install an SSL Certificate
3.1: Use Free SSL from Let’s Encrypt (Most Hosting Providers Offer This)
Most WordPress hosting companies (like Bluehost, Hostinger, SiteGround, and Cloudways) offer Let’s Encrypt SSL for free.
Here’s how to activate it:
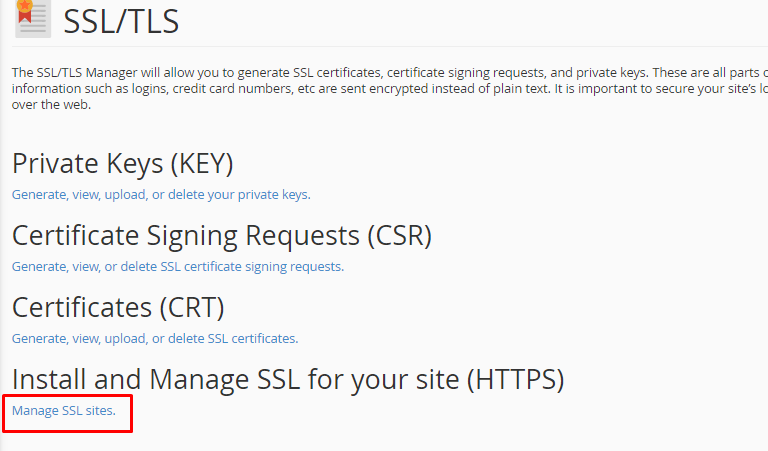
- Log in to your hosting control panel (cPanel or custom dashboard).
- Look for SSL/TLS Settings.
- Enable Let’s Encrypt SSL for your domain.
- Wait a few minutes for the certificate to install.
If you don’t see the option, contact your host’s support team. Some managed WordPress hosting platforms handle this automatically upon domain setup.
3.2: Purchase and Install a Premium SSL (Optional)
If you need extended validation (EV) or wildcard support (for multiple subdomains), you may choose a premium SSL from providers like:
- Comodo (now Sectigo)
- DigiCert
- GeoTrust
Follow the provider’s instructions for installation or request help from your host.
Step 4: Force HTTPS Across Your WordPress Site
Once the SSL is active, you need to tell WordPress to use HTTPS everywhere.
4.1: Update WordPress & Site URLs
- Go to Settings > General.
- Change both the WordPress Address (URL) and Site Address (URL) from
http://yourdomain.comtohttps://yourdomain.com.
4.2: Add SSL Redirects via Plugin (Recommended)
Use the plugin Really Simple SSL:
- Go to Plugins > Add New.
- Install and activate Really Simple SSL.
- It will auto-detect your SSL and configure everything.
- It also helps fix mixed content issues.
4.3: Manual Redirect via .htaccess
If you prefer manual setup, add the following to your .htaccess file (located in your site root):
apacheCopyEdit<IfModule mod_rewrite.c>
RewriteEngine On
RewriteCond %{HTTPS} off
RewriteRule ^(.*)$ https://%{HTTP_HOST}%{REQUEST_URI} [L,R=301]
</IfModule>
Note: Always back up .htaccess before editing.
Step 5: Fix Mixed Content Warnings
Even after HTTPS is enabled, some resources (images, scripts, CSS) may still be loading via HTTP. This causes “partially secure” warnings.
5.1: Use a Mixed Content Fixer Plugin
Install and activate:
- SSL Insecure Content Fixer
- Better Search Replace (for permanent URL replacement)
These plugins scan your content and update all http:// references to https://.
5.2: Manually Replace HTTP URLs
If you want to go deeper:
- Open your database via phpMyAdmin.
- Search and replace HTTP with HTTPS in:
wp_postswp_postmetawp_options
Or, use this SQL command cautiously:
sqlCopyEditUPDATE wp_options SET option_value = replace(option_value, 'http://yourdomain.com', 'https://yourdomain.com') WHERE option_name = 'home' OR option_name = 'siteurl';

Step 6: Clear All Caches
Changes won’t reflect if cached HTTP pages are still being served.
Clear:
- Browser cache (especially Chrome).
- WordPress caching plugins like WP Rocket, W3 Total Cache, or LiteSpeed.
- Server-level cache (like Varnish or NGINX).
- CDN cache (e.g., Cloudflare).
After clearing caches, open your site in an incognito window and check for the padlock icon.
Step 7: Notify Google & Update SEO Settings
Switching to HTTPS changes your site’s canonical URLs. To ensure proper indexing:
- Update Google Search Console:
- Add the new HTTPS version of your site.
- Submit an updated sitemap.
- Update Google Analytics:
- Go to Admin > Property Settings.
- Change the default URL to
https://.
- Update Yoast SEO or Rank Math Settings:
- Resubmit XML sitemaps.
- Ensure canonical URLs reflect HTTPS.
Step 8: Monitor for Ongoing Security Issues
Adding SSL is just the start. You need to protect your site continuously.
Use a Security Plugin
Install a WordPress security plugin like:
- MalCare
- Wordfence
- iThemes Security
These offer:
- Firewall protection
- Malware scanning
- Login protection
- IP blocking
- Real-time alerts
Update Regularly
Always update:
- WordPress core
- Plugins
- Themes
Outdated software is the #1 cause of vulnerabilities.
Troubleshooting SSL Errors
ERR_SSL_PROTOCOL_ERROR
This typically means your server doesn’t support modern TLS versions. Ask your host to enable TLS 1.2+.
NET::ERR_CERT_COMMON_NAME_INVALID
This means the SSL was issued for a different domain. Reissue the certificate with the correct domain/subdomain.
Redirect Loops or Too Many Redirects
Check your .htaccess, wp-config.php, and SSL plugin settings. Avoid conflicting redirect rules.
How “Not Secure” Warning Hurts Your Site
- Kills trust: Visitors hesitate to enter info or complete purchases.
- Search engine penalty: Google favors HTTPS sites in rankings.
- Conversion drops: Sales, leads, and sign-ups decline sharply.
- Blocked access: Some browsers may entirely block HTTP-only sites.
How to Prevent the Warning from Returning
- Enable auto-renewal of your SSL certificate.
- Use a security plugin that includes SSL monitoring.
- Check SSL status monthly via tools like SSL Labs.
- Force HTTPS via server config or plugin.
- Educate contributors to always use HTTPS when embedding URLs.
- Avoid hardcoded HTTP assets in themes/plugins.
Final Thoughts
The “Not Secure” warning is one of the easiest issues to fix, yet one of the most damaging if left unresolved. Thanks to modern tools, hosting integrations, and security plugins, you can configure SSL, fix mixed content, and enforce HTTPS in under an hour.
But don’t stop at just SSL.
Website security is a multi-layered process. Pair HTTPS with robust security practices—firewalls, daily scans, regular updates, and backups—to build long-term trust and authority for your WordPress site.
FAQs
Q: Is HTTPS mandatory for all websites?
Yes. HTTPS is no longer optional. Google and most browsers expect all websites to run securely.
Q: Can I install SSL without hosting support?
Yes, you can use Let’s Encrypt with manual DNS verification, but hosting support simplifies the process significantly.
Q: Do free SSL certificates offer the same protection?
Yes. Let’s Encrypt offers the same encryption level as paid ones. The difference lies in support and warranties.
Q: Will HTTPS make my site load slower?
No. Modern servers and browsers handle HTTPS efficiently. In many cases, it may even speed up your site with HTTP/2.