In the ever-evolving world of digital marketing, data is everything. Being able to track user interactions, form submissions, and on-site behaviors is no longer a luxury—it’s essential. One of the most effective ways to centralize and manage all your tracking scripts is by using Google Tag Manager (GTM). In this comprehensive guide, you’ll learn how to install Google Tag Manager on WordPress both manually and using plugins, while exploring in-depth strategies for configuration, testing, and integration.
What is Google Tag Manager (GTM)?
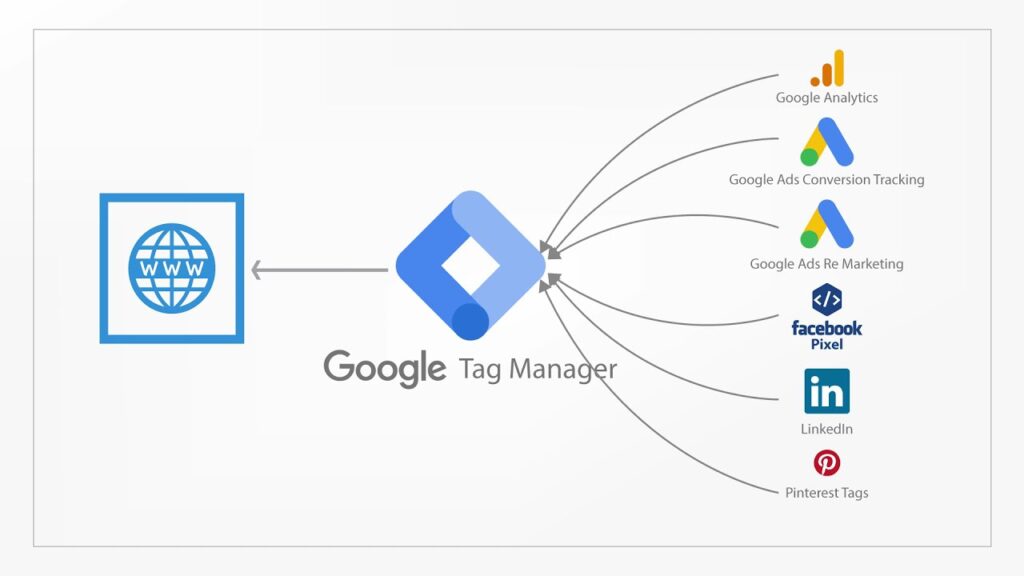
Google Tag Manager is a free tag management system developed by Google that allows you to insert tracking codes (tags) into your website without directly editing the code every time. These tags can be used to measure traffic, monitor user behavior, conduct remarketing campaigns, track conversions, and much more.
With GTM, instead of inserting each script into your website manually, you add a GTM container. This container holds all your tracking tags and triggers. By placing this single container code on your WordPress site, you can manage all analytics and tracking pixels from the GTM dashboard.
Benefits of Using Google Tag Manager with WordPress
Here are the key benefits of integrating GTM with your WordPress website:
- Centralized Tracking Management: Add or update tags from one dashboard without altering your site’s core files.
- Enhanced Site Performance: GTM loads tags asynchronously, which improves load times and user experience.
- Flexibility & Scalability: Supports Google Ads, Analytics, Facebook Pixel, LinkedIn Insight Tag, and many third-party tracking tools.
- Debugging Tools: GTM includes a Preview Mode and Debug Console to troubleshoot tag behavior.
- Role-Based Access Control: You can assign user permissions, allowing teams to manage tracking without full access to your WordPress backend.
Whether you’re running a blog, an ecommerce store, or a SaaS product, GTM helps you collect actionable data without the technical mess.
Prerequisites Before Installing GTM on WordPress
Before installing GTM, make sure you have the following in place:
1. A Google Account
This is required to create your Google Tag Manager container and optionally your Google Analytics account.
2. Admin Access to WordPress
To modify theme files or install plugins, you need admin privileges in your WordPress dashboard.
3. Backup Your WordPress Site
Before editing code, always take a full backup of your site using tools like UpdraftPlus or manually via your hosting panel.
4. Create a GTM Account and Container
- Go to tagmanager.google.com
- Click Start for Free and sign in with your Google account.
- Create an account, name your container (e.g., your domain name), and select the target platform as Web.
- Once created, you’ll receive a GTM code snippet containing your GTM-ID (e.g., GTM-XXXXXXX). Save this for later.
5. (Optional) Set Up Google Analytics 4 (GA4)
Head to analytics.google.com to create a GA4 property and obtain your Measurement ID (e.g., G-XXXXXXX) if you plan to track visits.
Method 1: Installing Google Tag Manager Manually in WordPress
Manual installation gives you full control and reduces dependency on plugins. Here’s how to do it:
Step 1: Access Theme Editor
- From your WordPress dashboard, go to Appearance > Theme File Editor.
- Locate and open the
header.phpfile.
Step 2: Insert GTM Code Snippets
Google provides two parts of the GTM code snippet:
- The Head Code: Copy this and paste it immediately after the opening
<head>tag. - The Body Code: Paste this immediately after the opening
<body>tag, usually found inheader.phporfooter.php, depending on your theme structure.
Example:
<!-- Google Tag Manager -->
<script>...</script>
<!-- End Google Tag Manager -->
<!-- Google Tag Manager (noscript) -->
<noscript><iframe src="..." ...></iframe></noscript>
<!-- End Google Tag Manager (noscript) -->Note: Edits made directly in theme files can be overwritten during theme updates. It’s best to use a child theme or custom functionality plugin.
Method 2: Installing Google Tag Manager on WordPress Using Plugins
If you’re not comfortable editing code, several plugins make GTM integration easier. Here are the top choices:
1. Insert Headers and Footers Plugin
- Go to Plugins > Add New, search for Insert Headers and Footers.
- Install and activate the plugin.
- Navigate to Settings > Insert Headers and Footers.
- Paste the head portion of your GTM code in the “Scripts in Header” box.
- Paste the body code in the “Scripts in Body” or “Scripts in Footer” section.
- Save changes.
2. WPCode Plugin (Formerly Insert Headers & Footers by WPBeginner)
- Install WPCode from the plugins library.
- Navigate to Code Snippets > Header & Footer.
- Paste the GTM container snippets as required.
- This plugin allows you to control exactly where the script is rendered without editing any files.
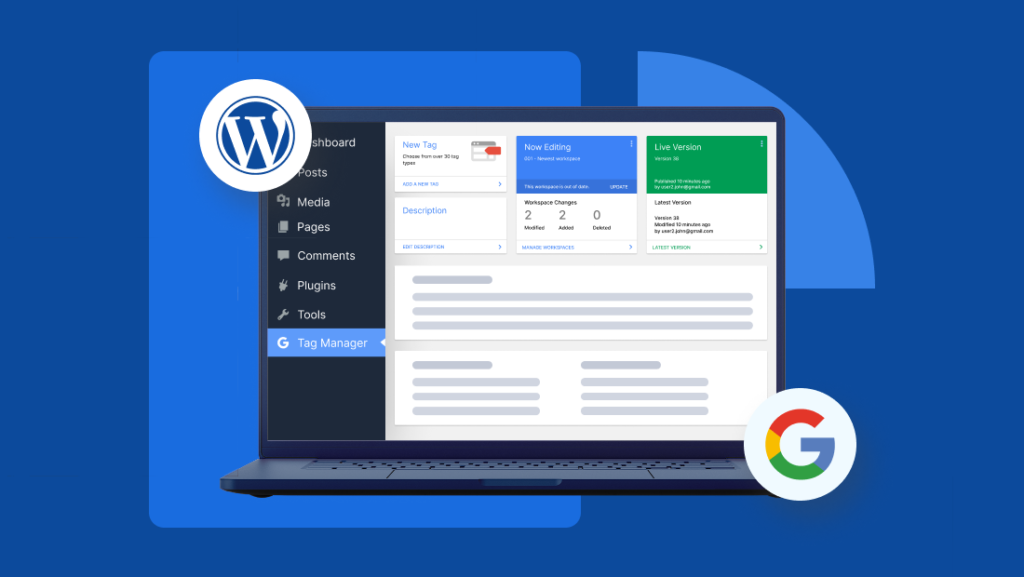
3. Site Kit by Google
For a fully integrated Google environment:
- Install the Site Kit by Google plugin.
- Connect your Google account.
- During setup, Site Kit will give you the option to connect Google Tag Manager.
- Follow on-screen steps to authenticate and deploy the GTM container automatically.
Pro Tip: After plugin-based installation, always verify whether GTM is loading correctly using the Tag Assistant Chrome extension or GTM’s built-in preview tools.
Configuring Tags and Triggers in GTM
With GTM now on your WordPress site, it’s time to configure the actual tags and triggers.
Setting Up a Google Analytics 4 Tag
- From your GTM dashboard, click Tags > New.
- Select Tag Type: Google Analytics: GA4 Configuration.
- Enter your GA4 Measurement ID.
- Choose the trigger as All Pages.
- Save and publish the tag.
Creating Triggers
Triggers define when tags fire.
- Click Triggers > New.
- Choose a trigger type like Page View, Click, or Form Submission.
- Define conditions (e.g., URL path equals “/thank-you”).
- Attach this trigger to any tag to control its firing logic.
Verifying GTM Installation
After setup, testing ensures everything is running as expected.
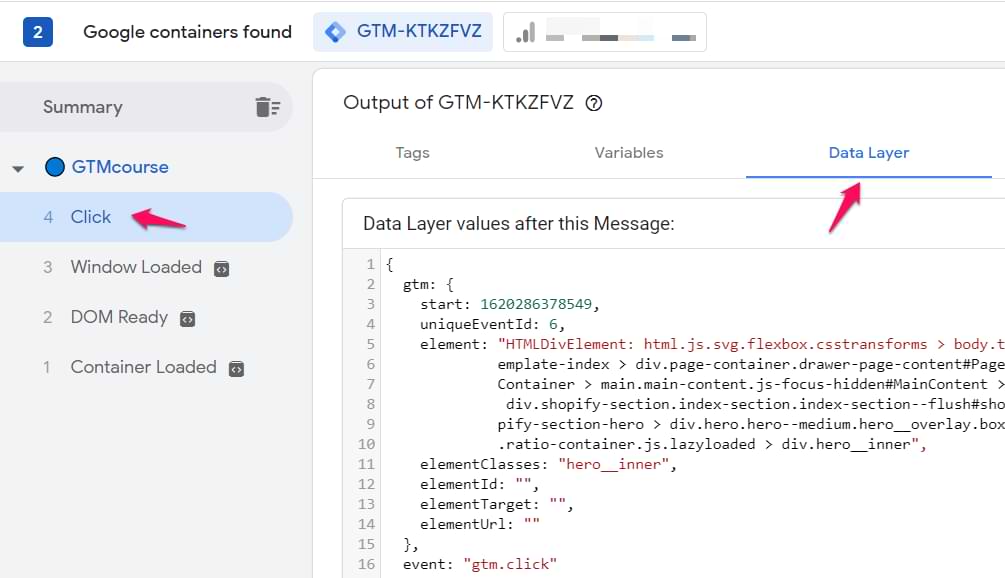
Use Preview Mode
- In GTM, click the Preview button.
- Enter your website URL.
- A new tab will open your site with a debug panel.
- This panel shows which tags are firing and why.
Use Google Tag Assistant Extension
- Install the Tag Assistant extension from Chrome Web Store.
- Open your site and enable the extension.
- It will show you all GTM tags, along with firing statuses and issues.
Advanced Tag Manager Use Cases
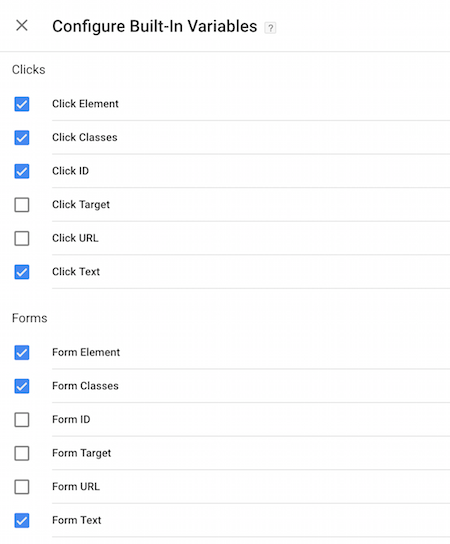
Button Click Tracking
- Use GTM’s built-in variables like Click Classes or Click ID.
- Create a Trigger: Click > All Elements.
- Set trigger condition (e.g., Click Class = “buy-now”).
- Attach to GA4 Event Tag or Facebook Pixel Event.
Form Submission Tracking
- Create a Form Submission trigger.
- Configure conditions (e.g., Form ID).
- Attach to an event tag.
Scroll Depth Tracking
- GTM has built-in Scroll Depth trigger types.
- Track when users scroll 25%, 50%, 75%, or 100%.
Facebook Pixel Integration
- Create a new tag: Custom HTML.
- Paste Facebook Pixel script.
- Trigger: All Pages or event-specific.
Troubleshooting Common Issues
- Tags Not Firing: Check trigger conditions and debug mode.
- Duplicate Tags: Make sure GTM isn’t adding tags already embedded manually or via another plugin.
- Slow Load Time: GTM loads asynchronously, but third-party tags may affect performance. Audit all active tags.
Final Thoughts
Integrating Google Tag Manager with your WordPress site is one of the smartest ways to modernize your digital analytics. Whether you choose to install it manually or through plugins, GTM provides a centralized, scalable, and user-friendly system to manage and deploy all your site tracking tools.
From monitoring page views with GA4 to retargeting visitors with Facebook Pixel, GTM becomes your mission control. The key lies in proper setup, testing, and regularly auditing your tags to ensure accuracy.
With this step-by-step guide, you now have the complete roadmap for installing and configuring Google Tag Manager on WordPress in 2025. Start tracking smarter—your data-driven growth strategy begins here.